
Ever wondered how to create a form that can upload multiple files directly to your desired S3 bucket? While tools like S3Fox and Transmit certainly get the job done quite well, sometimes we need a simpler, one-click interface for our clients. We'll build one today!
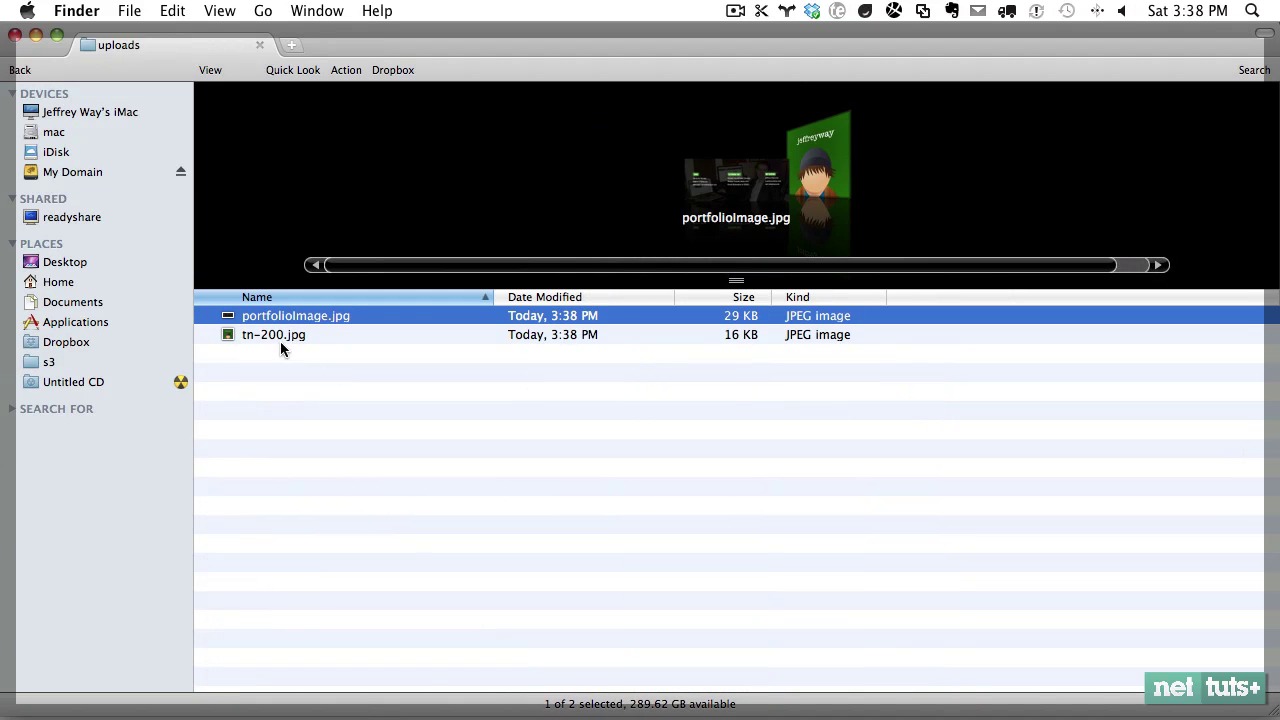
Final Product


The Game Plan
Let's figure out our goals first.
We want to build a simple upload page that will provide our clients/team members with the ability to uploads multiple files (assets) to our S3 account with a single click. This will make the process as simple as possible for them, and also comes with the bonus of restricting full access to our S3 account.
Step 1 - Don't Reinvent the Wheel
When working with APIs, always keep in mind that it might be far more beneficial to use existing classes, rather than wasting hours upon hours scouring through the API documentation yourself. Your time is better spent elsewhere. Besides, on the plus side, a tested wrapper class for your desired API will have the benefit of far more testing and debugging.
With that in mind, we'll use the excellent Amazon S3 PHP Class. Go ahead and download the zip file and drag the folder to the root of your project.
Step 2 - Include the Class
Let's begin building our simple controller. Create a new index.php file, and add:
1 |
|
2 |
// Display errors during production
|
3 |
ini_set('display_errors', 1); |
4 |
|
5 |
//include the S3 class
|
6 |
if ( !class_exists('S3') ) { |
7 |
require_once 's3/S3.php'; |
8 |
}
|
We first ensure that all errors are displayed on the page during production.
Next, we need to include the Amazon S3 class that we downloaded in step one. The specific file that we require is called S3.php. Now it should only be included in our project if the S3 class does not already exist. Technically, as we have complete control over these files, you can get away with removing this check, but it's still a best practice.
Full Screencast
Step 3 - AWS Credentials
The next step is to pass in our Amazon S3 credentials. This tutorial assumes that you have already signed up for an account, and have those keys available to you. As these values should not change through-out the cycle of our application, they should appropriately be declared as constants.
1 |
|
2 |
//AWS access info
|
3 |
if ( !defined('awsAccessKey') ) define('awsAccessKey', 'your-access-key'); |
4 |
if ( !defined('awsSecretKey') ) define('awsSecretKey', 'your-secret-key'); |
Step 4 - Instantiation
Okay, we required the necessary class file, and have declared our credentials. It's now time to create a new instance of the S3 class. This will then provide us with a plethora of helper methods when accessing S3.
1 |
|
2 |
//instantiate the class
|
3 |
$S3 = new S3( awsAccessKey, awsSecretKey ); |
This class will initially accept two parameters: the access key and secret key, respectively. Above, we're passing in the constants that we declared in step three.
Step 5 - Include the View
Okay, that'll do for now. Let's move forward and build our view -- or the form. Rather than combining all of this PHP and HTML, instead, we'll create a template file, and include it. At the bottom of index.php, add:
1 |
|
2 |
include 'index.tmpl.php'; |
Go ahead and create this new file, and feel free to store it within the root of your project directory. Let's add our initial markup and the form, itself.
1 |
|
2 |
<!DOCTYPE html>
|
3 |
<html lang="en" class="no-js"> |
4 |
<head>
|
5 |
<meta charset="UTF-8" /> |
6 |
<script>document.documentElement.className = 'js'; </script> |
7 |
|
8 |
<title>Upload to S3</title> |
9 |
|
10 |
<meta http-equiv="X-UA-Compatible" content="IE=edge,chrome=1"> |
11 |
|
12 |
<link rel="shortcut icon" href="favicon.ico"> |
13 |
</head>
|
14 |
<body>
|
15 |
|
16 |
<div id="container"> |
17 |
|
18 |
<h1>Upload a File </h1> |
19 |
|
20 |
<form action="index.php?uploads=complete" method="post" enctype="multipart/form-data"> |
21 |
<input name="theFile" type="file" id="file_upload" /> |
22 |
</form>
|
23 |
|
24 |
<noscript> Please enable JavaScript to upload multiple files. </noscript> |
25 |
|
26 |
</div>
|
27 |
|
28 |
</body>
|
29 |
</html>
|
This should all look mostly familiar to you. To point out a few specifics, though:
- The
X-UA-Compatiblemeta tag ensures that Internet Explorer, no matter what, uses its latest rendering engine, rather than falling back to IE7 mode. - We'll be using JavaScript to allow for multiple file uploads, so we need a hook in our markup. The most common solution is to apply a class of
no-jsto thehtmlelement, and then override it with JavaScript tojs. It's an easy solution! - Our simple form only contains a
fileinput. Note that we've set theenctypetomultipart/form-data. This is required for all file uploads. The submit button will be added later in this tutorial, when we integrate the Uploadify plugin. - For the time being, we've set the
actionof the form to the current page, but we've also passed the value "uploads" in the querystring.

Step 7 - Upon Upload
So, what happens when a user selects a file? Well excluding the fact that we haven't yet integrated the submit button yet, the file data will be stored in temporary memory. We'll handle the process of actually saving the files to our local folder in a future step. For now, let's proceed, assuming that files have been saved to our "uploads" folder.
Let's listen for an upload with PHP. Return to your index.php controller. Immediately after you created a new instance of the S3 class:
1 |
|
2 |
//instantiate the class
|
3 |
$s3 = new S3(awsAccessKey, awsSecretKey); |
4 |
|
5 |
//check whether a form was submitted.
|
6 |
if ( isset($_GET['uploads']) ) { |
7 |
|
8 |
}
|
Remember how we set the action attribute of the form to pass ?uploads=complete in the querystring? That value will then be available to us, via: $_GET['uploads']. So, when the page loads, if that value exists, then we know that the form has been submitted. Excellent!
Next, we should declare some variables, which reference how and where we want to support the submitted files. The following code should be placed within the if statement above.
1 |
|
2 |
$bucketName = 'myUploadr'; |
3 |
$uploadsDir = 'uploads/'; |
4 |
$refused_types = array('application/exe'); |
When you read "bucket", think "folder."
S3 uses the term bucket, but it essentially refers to a folder name within your account. Feel free to name this how you wish. I've called my bucket, myUploadr.
Next, we need to know where the uploaded files were stored. We'll then use that path to sequentially upload the files in that folder to the S3 bucket. Create a folder, called uploads, and place it within the root of your project.
Lastly, we should designate either which file types can be uploaded, or the opposite. This option will be dependent upon your project's specific needs. In this case, to keep things simple, we'll deny all exe files, but feel free to modify this how you wish.
Note that the
$refused_typesarray doesn't do anything in and of itself. It's simply an array that we'll hook into later.
Step 8 - Scanning the Uploads Directory
To determine what files we have to work with, we need to scan the uploads directory. PHP offers the helpful scandir function to allow for this.
1 |
|
2 |
$files = scandir($uploadsDir); |
3 |
array_shift($files); |
4 |
array_shift($files); |
Ever notice how the scanDir function always returns two items: '.' and '..'? These refer to folders, and, though we could be a little more technical about it, let's be lazy and slice those two off our list by using the array_shift function. That'll leave us with:
1 |
|
2 |
Array
|
3 |
(
|
4 |
[0] => some-file.jpg |
5 |
)
|
Step 9 - Send to S3
All right, now that we have an array of all the files that need to be uploaded, let's take advantage of the S3 class! Let's figure this out. We need to:
- Create an S3 bucket
- Filter through all of the files in the "uploads" directory
- Change the name of the file to something unique. Maybe we can use PHP's
timefunction for this. Otherwise, we risk overwriting files that have the same names. - Upload the file to S3
- Delete the file from our temporary "uploads" folder, because it's now stored on S3.
1 |
|
2 |
//create a new bucket
|
3 |
$S3->putBucket("$bucketName", S3::ACL_PUBLIC_READ); |
4 |
|
5 |
// filter through items in the "uploads/" folder
|
6 |
for ( $i = 0; $i < count($files); $i++ ) { |
7 |
// Determine what type of file it is. (for example, "image/png")
|
8 |
$mt = mime_content_type('uploads/' . $files[$i]); |
9 |
|
10 |
// If the file type is in our refused_types array, delete it, and continue...
|
11 |
if ( in_array($mt, $refused_types) ) { |
12 |
// can't accept this file type. Delete it.
|
13 |
// You could also reverse this to only accepted allowed-types.
|
14 |
unlink($uploadsDir . $fils[$i]); |
15 |
continue; |
16 |
}
|
17 |
//Prefix a unique sequence of characters to the file name
|
18 |
$fileName = time() . '-' . $files[$i]; |
19 |
|
20 |
// path to file we want to move, the desired bucket, the desired file name, when it is added to the bucket, Access control list
|
21 |
if ($S3->putObjectFile($uploadsDir . $files[$i], "$bucketName", $fileName, S3::ACL_PUBLIC_READ)) { |
22 |
// delete file
|
23 |
unlink($uploadsDir . $files[$i]); |
24 |
|
25 |
//update filesArr
|
26 |
$filesArr[$files[$i]] = "http://$bucketName.s3.amazonaws.com/$fileName"; |
27 |
}
|
Line by Line
Okay, let's take that code line by line, for maximum clarity.
1 |
|
2 |
$S3->putBucket("$bucketName", S3::ACL_PUBLIC_READ); |
This method of the $S3 class allows us to add a new bucket to our S3 account. It accepts two parameters: the name of the bucket, and the permissions. Here, we've passed in "myUploadr," and have set the permissions to public read all.
1 |
|
2 |
for ( $i = 0; $i < count($files); $i++ ) { |
This for statement will allow us to cycle through all of the images in the uploads folder.
1 |
|
2 |
$fileName = time() . '-' . $files[$i]; |
This line will ensure that the filename is unique, and doesn't clash with existing files in the bucket on S3. The time() function will prefix a unique string of characters to our file name.
1 |
|
2 |
if ($S3->putObjectFile($uploadsDir . $files[$i], "$bucketName", $fileName, S3::ACL_PUBLIC_READ)) { |
This line handles the process of uploading the file to S3, thanks to the helpful putObjectFile method of the S3 class. This method will accept four primary parameters.
- The path to the file we wish to upload to S3
- The name of the bucket (folder) that we're uploading to
- The desired file name
- Your assigned access privileges
1 |
|
2 |
unlink($uploadsDir . $files[$i]); |
If the file was uploaded successfully, we no longer need it stored locally. We can delete the file by using PHP's unlink function, and passing in a path to the file that should be deleted.
Now what if we're uploading multiple files to S3, which is likely? We need a place to store the paths to all of these files, right? With that in mind, let's create a new array, called $filesArr.
1 |
|
2 |
// an array containing links to all of the uploaded images
|
3 |
$filesArr = array(); |
You can place this at the top of your if statement. With that array we created, we only need to push the path to each uploaded file to it.
1 |
|
2 |
//update filesArr
|
3 |
$filesArr[ $files[$i] ] = "http://$bucketName.s3.amazonaws.com/$fileName"; |
Once the for statement completes, $fileArr will consequently contain a list of paths to every uploaded file. Presto!
Completed index.php File
Refer below for the completed source code for our simple "controller."
1 |
|
2 |
<?php |
3 |
ini_set('display_errors', 0);
|
4 |
|
5 |
//include the S3 class |
6 |
if (!class_exists('S3'))require_once 's3/S3.php';
|
7 |
|
8 |
//AWS access info |
9 |
if (!defined('awsAccessKey')) define('awsAccessKey', 'your-access-key');
|
10 |
if (!defined('awsSecretKey')) define('awsSecretKey', 'your-secret-key');
|
11 |
|
12 |
//instantiate the class |
13 |
$s3 = new S3(awsAccessKey, awsSecretKey); |
14 |
|
15 |
//check whether a form was submitted |
16 |
if (isset($_GET['uploads'])) {
|
17 |
$bucketName = 'myUploadr'; |
18 |
$uploadsDir = 'uploads/'; |
19 |
|
20 |
// $filesArr is an array containing links to all of the uploaded images |
21 |
$filesArr = array(); |
22 |
|
23 |
$files = scandir($uploadsDir); |
24 |
array_shift($files); |
25 |
array_shift($files); |
26 |
|
27 |
//create a new bucket |
28 |
$s3->putBucket("$bucketName", S3::ACL_PUBLIC_READ);
|
29 |
|
30 |
// filter through items in uplaod folder |
31 |
for ( $i = 0; $i < count($files); $i++ ) {
|
32 |
//retrieve post variables |
33 |
$fileName = time() . '-' . $files[$i]; |
34 |
|
35 |
// path to file we want to move, the desired bucket, the desired file name, when it is added to the bucket, Access control list |
36 |
if ($s3->putObjectFile($uploadsDir . $files[$i], "$bucketName", $fileName, S3::ACL_PUBLIC_READ)) {
|
37 |
// delete file |
38 |
unlink($uploadsDir . $files[$i]); |
39 |
|
40 |
//update filesArr |
41 |
$filesArr[$files[$i]] = "http://$bucketName.s3.amazonaws.com/$fileName"; |
42 |
} |
43 |
|
44 |
} |
45 |
|
46 |
} |
47 |
|
48 |
include 'index.tmpl.php'; |
Step 11 - File Uploads with Uploadify


We've written all of the server-side functionality for our little web app. But now, we need to handle the front-end process of uploading multiple files to our uploads/ directory. To do so, we'll take advantage of the handy Uploadify.
"Uploadify is a jQuery plugin that integrates a fully-customizable multiple file upload utility on your website. It uses a mixture of Javascript, ActionScript, and any server-side language to dynamically create an instance over any DOM element on a page."
Download
The first step, when integrating Uploadify, is to download the necessary files. They can be obtained here. Rename the downloaded folder to "uploadify," and place it within the root of your project directory.
Script References
Next, we need to reference the necessary files from our view. Return to index.tmpl.php, and, just before the closing body tag, append:
1 |
|
2 |
<script src="http://ajax.googleapis.com/ajax/libs/jquery/1.5.0/jquery.min.js"></script> |
3 |
<script src="uploadify/swfobject.js"></script> |
4 |
<script src="uploadify/jquery.uploadify.v2.1.4.min.js"></script> |
5 |
<script src="js/scripts.js"></script> |
Here, we reference the latest version of jQuery, swfobject, Uploadify's core script, and our own scripts.js file (you can create that file now).
Scripts.js
Let's now activate Uploadify.
1 |
|
2 |
(function() { |
3 |
|
4 |
var myUploadr = { |
5 |
|
6 |
uploadify : function() { |
7 |
$('#file_upload').uploadify({ |
8 |
'uploader' : 'uploadify/uploadify.swf', |
9 |
'script' : 'uploadify/uploadify.php', |
10 |
'cancelImg' : 'uploadify/cancel.png', |
11 |
'folder' : 'uploads/', |
12 |
'auto' : true, |
13 |
'multi' : true, |
14 |
'wmode' : 'transparent', |
15 |
'buttonText': 'Send to S3', |
16 |
'sizeLimit' : 10485760, // 10 megs |
17 |
'onAllComplete' : function() { |
18 |
// all files finished uploading
|
19 |
location = "index.php?uploads=complete"; |
20 |
}
|
21 |
});
|
22 |
}
|
23 |
|
24 |
}
|
25 |
|
26 |
})();
|
Activating Uploadify is as simple as calling a method. Remember, Uploadify is just an awesome jQuery plugin. This method accepts plenty of optional parameters. I encourage you to look over them here. For our particular needs, we only require a handful.
- uploader: The path to the
swffile that handles the submit button -
script: The path to
uploadify.php - cancelImg: The path to the cancel button. (One is provided by default)
- folder: The path to the folder where the uploaded files will be stored
- auto: A boolean, which indicates if uploads should be performed automatically.
- multi: Are multiple file uploads allowed?
-
wmode: Set this to
transparentto ensure that there aren't any "z-index" type issues, where the button is displayed over a drop-down menu, or something similar. - buttonTxt: What should the submit button say?
- sizeLimit: What's the maximum file size that we'll accept?
-
onAllComplete: This method will run when all of the files have finished uploading. In our case, we're reloading the page, and are passing the
uploads=completeparam in the query string.
That should do it! Just make sure that you call our uploadify function at the bottom of scripts.js.
1 |
|
2 |
myUploadr.uploadify(); |
This code will apply the custom button to your form, and will also handle the logic of uploading and transferring your files to the necessary folder.


Step 12 - Displaying the Results
At this point, we've written the bulk of our logic. But there's one last task that we need to finish. Remember when we wrote the logic that handled uploads to our S3 account? We stored the links in an array, called $filesArr.
When our form loads, we should determine if this array exists and isn't empty. If that's the case, the files have already been uploaded, in which case we only need to display links to each uploaded asset.
Return to index.tmpl.php, and, just below the primary form, add the following:
1 |
|
2 |
<?php if ( !empty($filesArr) ) : ?>
|
3 |
<div class="overlay"> |
4 |
<hr /> |
5 |
<h2> Links to Uploaded Files</h2> |
6 |
<ul>
|
7 |
<?php foreach( $files_arr as $name => $path ) : ?>
|
8 |
<li>
|
9 |
<a target="_blank" href="<?php echo $path; ?>"> <?php echo $name; ?> </a> |
10 |
</li>
|
11 |
<?php endforeach; ?>
|
12 |
</ul>
|
13 |
</div>
|
14 |
<?php endif; ?>
|
This bit of code first determines if $filesArr exists. If it does, then it contains both the name and link to each uploaded file. To display those links, the process is as simple as filtering through each item in the array, and echoing out an anchor tag, which links to the associated file.

Completion
That should do it! Now that all of the functionality is out of the way, your next step is to style the page to your specific needs. We could cover that, but it's decidedly beyond the scope of this tutorial. Use your imagination -- here's what I ended up with.
Thanks for reading, and let me know if you have any questions! If parts of the written tutorial confused you, be sure to watch the screencast as well!


